Oracle ERP Cloud Evaluated Receipt Settlements (ERS)

In the realm of automated invoicing, it might come across the term “Payment on Receipt Auto Invoice Program,” which is alternatively referred to as “Evaluated Receipt Settlement” (ERS) and “Self-Billing.” This innovative system leverages the details from both the receipt and purchase order to generate invoices, effectively eradicating the need for redundant manual data input. By doing so, it not only streamlines the invoicing process, but also guarantees precision and punctuality in data handling.
ERS, often known as the “Pay on Receipt” program, stands as a widely adopted and standardized approach for the automated creation of payable invoices based on purchase order receipts. This method brings a significant level of automation to the invoicing procedure, significantly reducing the workload associated with manual data entry.
Setups for Pay on Receipt in the Cloud
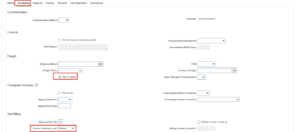
- Enable Pay on Receipt in the Purchasing Tab of the Supplier Site Level and Invoice Summery level should be Receipt
- Pay on Receipt Privilege should be added in any assigned Custom Role (If not Create Custom)

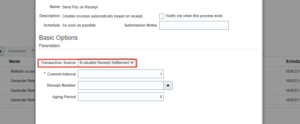
- Schedule the Send Pay on Receipt Auto invoice program or run this program manually too with the below Parameter.
- Transaction Source: ERS (Evaluated Receipt Settlement)
Functional Workflow of ERS Invoice
- Purchase Order Creation with Pay on Receipt Enabled Supplier
- Receipt Creation
- Run the ‘Send Pay on Receipt’ Schedule Program with the source as ERS
Purchase Order Creation
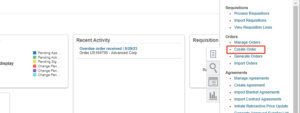
- Navigation: Procurement > Purchase Orders> Create Order
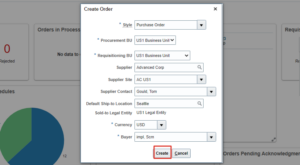
- Select the Supplier which has pay-on receipt enabled in the Supplier site level
- Select the currency and Buyer details then click on create
- Whenever Pay on receipt is in the supplier site level, it will default in the PO header Level
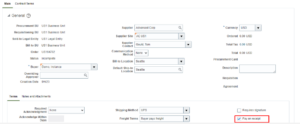
- Create Line details by clicking on the + icon
- Enter the line details: item, Description, UOM, Category, Quantity, Price, Location

- Provide the Requested and Promised Delivery Dates in the Schedules Tab

- Distributions will be populated once click on Save

- Go to Actions and Validate then Submit the Document for Approval

- Receipt Creation
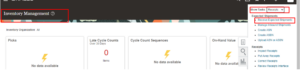
- Navigation: Supply chain Execution > Inventory Management > Receipts > Receive Expected Shipments
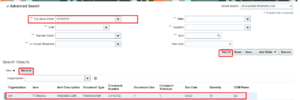
- Provide the purchase order number and click on Search
- Select the line and click on Receive
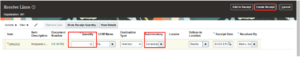
- Provide the received quantity which has received and sub-inventory
- Click on Create Receipt
- Provide the shipment details/waybill details and click on submit

- Run the Send Pay on Receipt Schedule Process
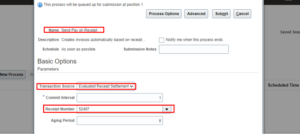
- Navigation: Go to Tools > Under Scheduled Processes > Choose Schedule New Process

- Type: Job
- Name: Send Pay on Receipt
- Transaction Source: Evaluated Receipt Settlement
- Receipt Number (want to create any specific Receipt)
- Submit

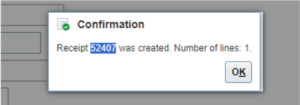
- Three processes will run, one of which is ‘Send Pay on Receipt

- See the generated invoices > Select the Import Payables Invoices Report >Republish in PDF Format
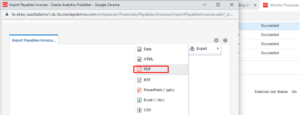
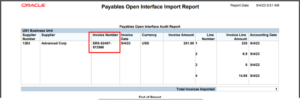
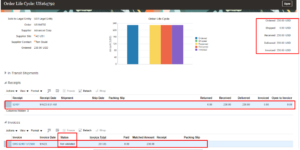
- Check the full life cycle at the document level
- Invoice Status will be Not validated
Roles and Privileges
- Purchase Order creation- Buyer Role
- Receiving- Receiving Agent
- Send Pay on Receipt Process- Pay on Receipt Privilege
Limitations
Below are the limitations of Oracle ERP Cloud Evaluated Receipt Settlements (ERS):
- As per the ERS method, Only one invoice per receipt per supplier pay site will be created when selecting Pay on the option to Receipt
- The lines of the AP invoice will depend upon the number of items received in the Purchase Receipt
Business Benefits
Here are the compelling benefits that Oracle ERP Cloud Evaluated Receipt Settlements (ERS) offers:
- Streamlining Operations: Implementing the ERS Process leads to the elimination of redundant manual data entry, ensuring that data is processed accurately and promptly.
- Effortless Invoice Creation: With this system in place, you can effortlessly generate invoices with multiple items and distribution lines, all while automatically factoring in sales tax.
- Simplified Cost Calculation: The invoice amount is determined by a straightforward multiplication of the received quantity by the unit price specified in the purchase order.
- Automated Efficiency: Invoice payment terms are conveniently pre-populated from the purchase order payment terms, and payment currency defaults from the Supplier site. Additionally, sales tax calculations are seamlessly handled based on the tax codes assigned to each purchase order line.
Author: Srinivas Mamidi, Oracle Cloud SCM Functional Consultant